Beta
Neon Auth is in beta and ready to use. We're actively improving it based on feedback from developers like you. Share your experience in our Discord or via the Neon Console.
Neon Auth connects your authentication provider to your Neon database, automatically synchronizing user profiles so that you own your auth data. Access your user data directly in your database environment, with no custom integration code needed.
Authentication and synchronization
When implementing user authentication, it is common to use managed authentication providers like Stack Auth, Clerk, and others to handle the complexities of user identity, passwords, and security. However, keeping your database in sync with these providers typically requires additional development work.
Neon Auth solves this by integrating your auth provider with your Postgres database, ensuring your application always has access to up-to-date user information right from your database.
Key benefits
- Provision auth provider projects and manage your users directly from the Neon Console
- Automated synchronization of user profiles between auth provider and your database
- Easy database relationships, since your user profiles are available as any other table
How Neon Auth works
When you set up Neon Auth, we create a neon_auth schema in your database. As users authenticate and manage their profiles in your auth provider, their data is automatically synchronized to your database.
Here is the basic flow:
-
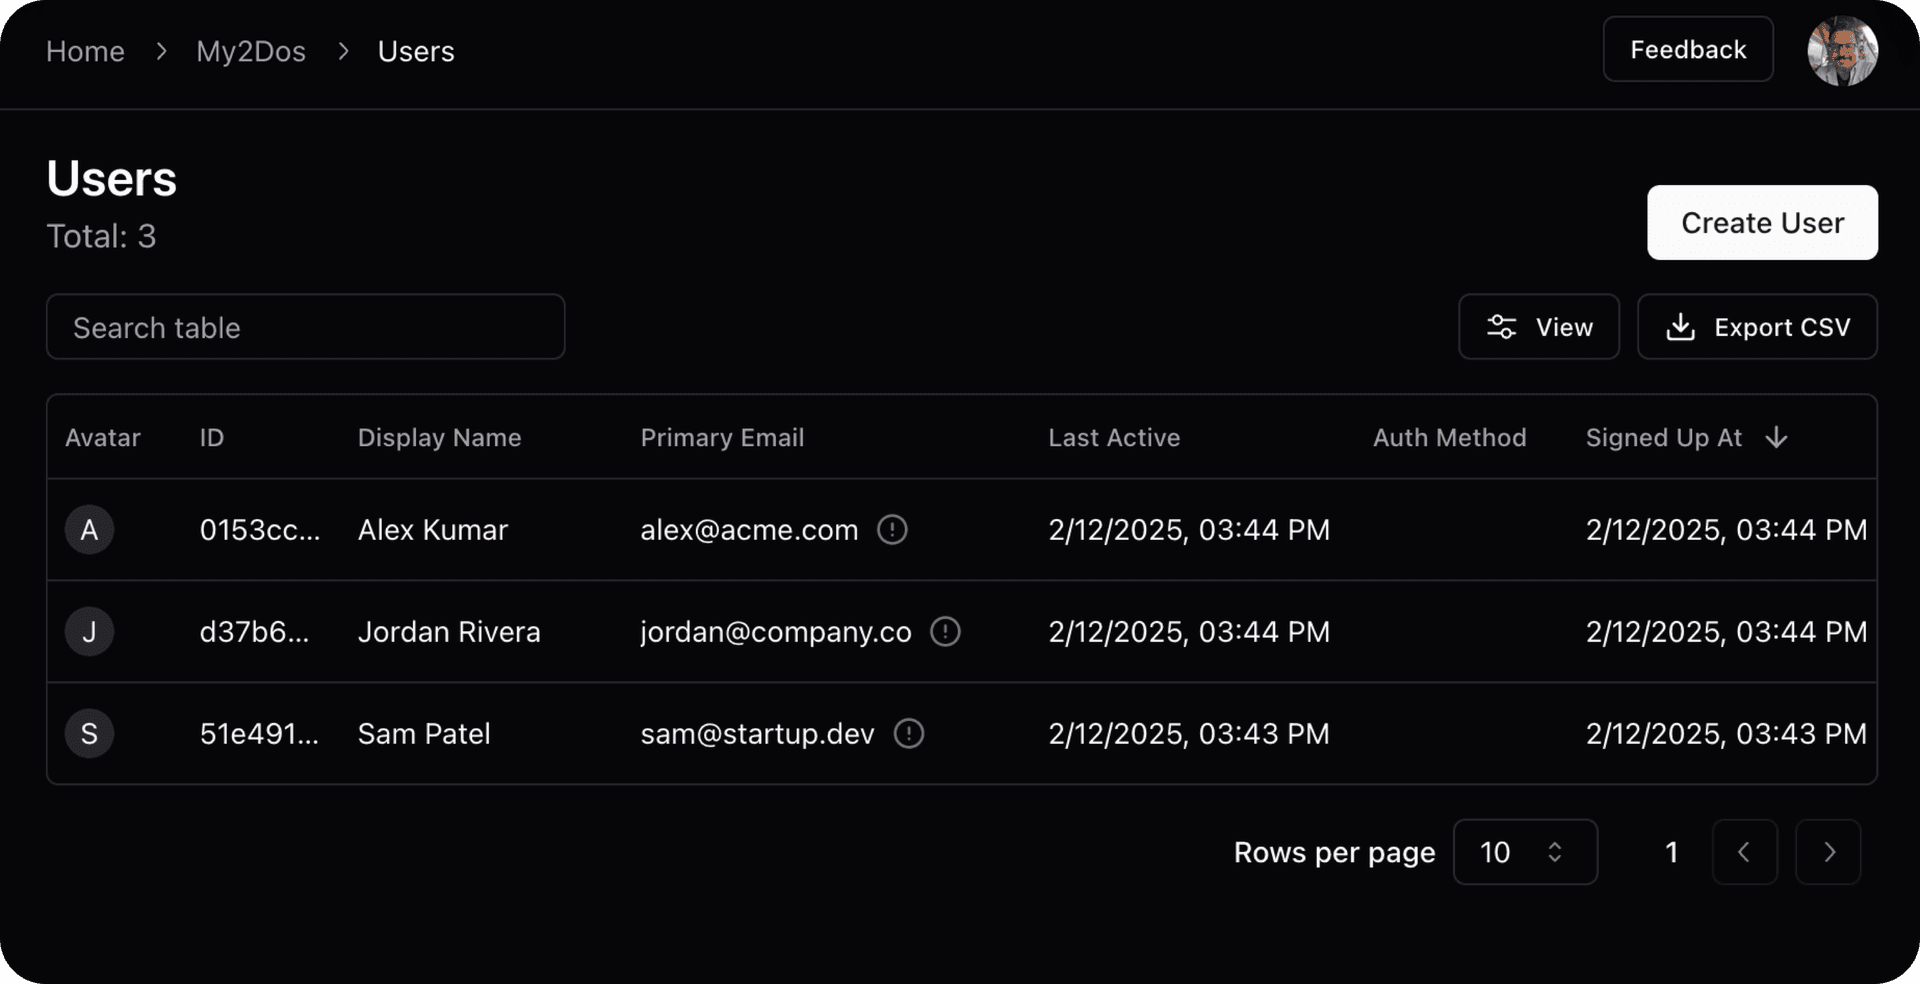
User profiles are created and managed in your authentication provider
This view shows the list of users inside your auth provider (e.g. Stack Auth). When new users sign up or update their profiles in your app, their data first appears here:
-
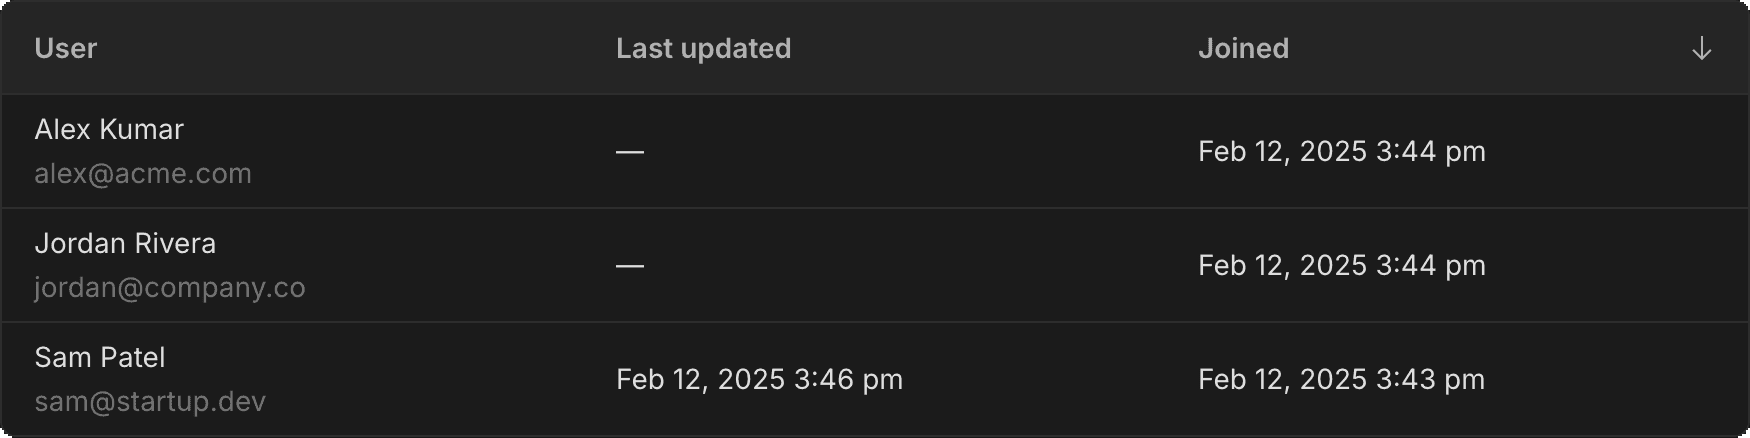
Neon Auth syncs their data to your database
This view shows the synced user profiles in Neon Auth. This is where Neon manages the connection between your database and the authentication provider.
-
The data is immediately available in your database
The synchronized data is available in the
neon_auth.users_synctable shortly after the auth provider processes changes. Here's an example query to inspect the synchronized data:SELECT * FROM neon_auth.users_sync;id name email created_at updated_at deleted_at raw_json d37b6a30... Jordan Rivera jordan@company.co 2025-02-12 19:44... null null {"id": "d37b6a30...", ...} 0153cc96... Alex Kumar alex@acme.com 2025-02-12 19:44... null null {"id": "0153cc96...", ...} 51e491df... Sam Patel sam@startup.dev 2025-02-12 19:43... 2025-02-12 19:46... null {"id": "51e491df...", ...}
Table structure
The following columns are included in the neon_auth.users_sync table:
raw_json: Complete user profile as JSONid: The unique ID of the username: The user's display name (nullable)email: The user's primary email (nullable)created_at: When the user signed up (nullable)deleted_at: When the user was deleted, if applicable (nullable)updated_at: When the user was last updated, if applicable (nullable)
Updates to user profiles in the auth provider are automatically synchronized.
note
Do not try to change the neon_auth.users_sync table name. It's needed for the synchronization process to work correctly.
Before and after Neon Auth
Let's take a look at how Neon Auth can help simplify the code in a typical todos application:
Before Neon Auth
Without Neon Auth, keeping user data in sync often involves:
- Using additional services (like Inngest) for background jobs
- Writing and maintaining sync logic
Here's how you'd typically sync user data without Neon Auth:
import { AuthProvider } from '@auth/sdk';
import { BackgroundJobs } from '@jobs/sdk';
import { db } from '@/db';

// Set up sync handling
const jobs = new BackgroundJobs();

jobs.on('user.updated', async (event) => {
  const { userId } = event;

  // Fetch user data from auth provider
  const auth = new AuthProvider();
  const user = await auth.getUser(userId);

  // Update database
  await db.query(
    `
    INSERT INTO users (id, email, name)
    VALUES ($1, $2, $3)
    ON CONFLICT (id) DO UPDATE
    SET email = $2, name = $3
  `,
    [user.id, user.email, user.name]
  );
});
After Neon Auth
With Neon Auth, much of this complexity is eliminated. Since user data is automatically synced to neon_auth.users_sync, you can just create the todo:
async function createTodo(userId: string, task: string) {
  return db.query(
    `INSERT INTO todos (task, user_id)
     VALUES ($1, $2)`,
    [task, userId]
  );
}
Getting started
Neon Auth offers two ways to connect your authentication provider:
-
Quick Start (Recommended)
- Automatically provision a pre-configured Stack Auth project, managed by Neon
- Includes recommended security settings
- Best for new projects or first-time Stack Auth users
-
Manual Setup
- Connect your existing Stack Auth project
- Configure authentication settings to match your needs
- Provide your Stack Auth project details during setup
Choose your setup option in the Neon Console under the Auth page.
Transfer ownership
When you create a Neon Auth integration using the Quick Start option from the Auth page (or using the Create integration API), Neon manages the auth project for you.
You can claim ownership of the project to your own Stack Auth account by clicking Transfer ownership in the Auth page.

This opens a transfer confirmation page where you can select which Stack Auth account should receive ownership of the project. After confirming the transfer, you'll have direct access to manage your project in the Stack Auth dashboard while maintaining the integration with your Neon database.
note
After transfer, you'll still be able to access your project from the Neon Console, but you'll also have direct access from the Stack Auth dashboard.
Using the API
You can manage your Neon Auth integration programmatically using the API. This includes creating integrations, managing users, and transferring ownership.
Key operations:
- Create or remove a Neon-managed auth integration
- Generate SDK keys for your integration
- Create users in your auth provider
- Transfer ownership to your auth provider
See Manage Neon Auth using the API for details.
Best practices
Foreign keys and the users_sync table
Since the neon_auth.users_sync table is updated asynchronously, there may be a brief delay (usually less than 1 second) before a user's data appears in the table. Consider this possible delay when deciding whether to use foreign keys in your schema.
If you do choose to use foreign keys, make sure to specify an ON DELETE behavior that matches your needs: for example, CASCADE for personal data like todos or user preferences, and SET NULL for content like blog posts or comments that should persist after user deletion.
-- For personal data that should be removed with the user (e.g., todos)
CREATE TABLE todos (
    id SERIAL PRIMARY KEY,
    task TEXT NOT NULL,
    user_id UUID NOT NULL REFERENCES neon_auth.users_sync(id) ON DELETE CASCADE,
    created_at TIMESTAMPTZ DEFAULT CURRENT_TIMESTAMP
);

-- For content that should persist after user deletion (e.g., blog posts)
CREATE TABLE posts (
    id SERIAL PRIMARY KEY,
    title TEXT NOT NULL,
    content TEXT NOT NULL,
    author_id UUID REFERENCES neon_auth.users_sync(id) ON DELETE SET NULL,
    created_at TIMESTAMPTZ DEFAULT CURRENT_TIMESTAMP
);
Querying user data
When querying data that relates to users:
- Use LEFT JOINs instead of INNER JOINs with the
users_synctable in case of any sync delays. This ensures that all records from the main table (e.g., posts) are returned even if there's no matching user in theusers_synctable yet. - Filter out deleted users since the table uses soft deletes (users are marked with a
deleted_attimestamp when deleted).
Here's an example of how to handle both in your queries:
SELECT posts.*, neon_auth.users_sync.name as author_name
FROM posts
LEFT JOIN neon_auth.users_sync ON posts.author_id = neon_auth.users_sync.id
WHERE neon_auth.users_sync.deleted_at IS NULL;